Tuesday, December 20, 2011

Irish Cream Chocolate Chip Parfaits and a Handmade Keepsake Ornament

Oh yes, I did. 
     Those really are Irish Cream dipped chocolate chip cookies nestled snugly between luscious layers of whipped cream. And they're sitting in my refrigerator getting more delicious by the minute. As they mellow, the Irish Cream soaked cookies become almost cake-like, and each spoonful is a bite of creamy goodness studded with crunchy chocolate chips suspended in silky whipped cream.

     Surprisingly enough, the best cookies for this recipe are the crunchy store-bought ones. (Chips Ahoy, if you can get them.) I've included a link in the recipe for a non-alcoholic Irish Cream if you prefer not to go the alcoholic route, but I'm also thinking that any sweet milky coffee-type drink (like a bottled frappuccino) would work.

     My friend Felicia introduced me to this wonderfully quick and easy make-ahead dessert. (Can you believe there are only three ingredients?) She makes hers in a 9x12 dish, but I thought it would also be cute in individual serving jars. But isn't most anything cuter in a Weck jar?


     Speaking of cute, here's what has been keeping my attention these last few weeks. Yep, grandson has moved back to VA and we've been having lots of family fun together. (Yay!) Here's a little project that we did together that makes a great keepsake ornament. (Grandmas love these things!) This is one of my favorite ornaments, and I've been making these with my students for years.


This idea came from Little Giraffes, and they have a link to a printable tag here. Instructions: Paint child's palm and fingers white. Have them wrap their hand and fingers around a ball shaped ornament to transfer their handprint. Decorate with paint markers, and don't forget to put your child's name and date! Include a tag with this poem:
These aren't just five snowmen, 
As anyone can see.
I made them with my hand 
Which is a part of me.
And now each year when you trim the tree
You'll look back and recall,
Christmas of 2011
When my hand was just this small!

I'll be back soon with more holiday goodies- my baking partner is back and we plan to get into lots of cookie trouble together!

Irish Cream Chocolate Chip Parfait Recipe
recipe from Felicia
Ingredients
1 pkg. Chocolate Chip cookies, crunchy ones- not soft (Chips Ahoy work beautifully.)
Whipped cream (made from a pint of heavy cream) or 1 tub Whipped topping
Irish Cream liqueur or non-alcoholic Irish Cream (I'm thinking that even a bottled frappuccino would work here.)
  • Pour about 1/2 cup of Irish Cream into a bowl. (More if you need it) Dip cookies one at a time into the Irish Cream. I usually let them stay in a few seconds and then turn them over to make sure they're completely covered. Don't leave them in long enough to get soggy- they'll fall apart.
  • For a 9x12 baking dish: Start with a layer of dipped cookies and then top with a layer of whipped cream. Repeat the layers and finish with a sprinkling of crushed cookies.  
  • For parfait glasses or canning jars: Alternate layers of dipped cookies and whipped cream. End up with whipped cream as the top layer and then sprinkle with some crumbled cookies. 
  • Cover and refrigerate for at least a couple of hours (can be done a day ahead) before serving so the cookies have a chance to absorb the liqueur and soften.


Monday, November 21, 2011

Split Pea Soup with Celeriac


     The excesses of Thanksgiving are behind me (literally as well as figuratively, I'm afraid), and now simple hearty fare like this split pea soup is what I'm craving. It's a great way to use up the leftovers from your holiday ham or you could opt for a vegetarian version. I love the humble celery root in this recipe. It won't win any beauty contests, but it imparts a subtle celery flavor and adds body and texture to the soup. Some pumpernickel croutons or a nice slice of crusty bread make a perfect accompaniment. Make some for now and freeze some for later- it'll come in handy when you need a quick meal on a cold evening!

Split Pea Soup with Celeriac and Ham
Ingredients
1 ham bone with the fat trimmed off OR 1 Tablespoon Better Than Boullion Ham Base  OR a smoked ham hock. For a vegetarian/vegan option, use water or vegetable broth instead.
1 lb. dried split peas
1 small/medium onion, finely chopped
1 carrot, finely diced
1 celery root, peeled and finely diced
1 leek, thoroughly washed and finely sliced (optional- if you don't use it though, add a bit more onion)
1/2 lb. cubed cooked ham -or however much you like in your soup (optional)
A couple of sprigs of fresh thyme
salt and pepper to taste
Directions
  •  Rinse split peas in a colander, and go through them to make sure there are no rocks. (Yes, I've found them before in bags of beans!)
  • Put all ingredients except cubed ham, salt and pepper in large soup pot with 1 1/2-2 qts. water.
  • Bring to a boil, reduce heat and simmer about 1-2 hours, or until peas and vegetables are very tender.
  • Remove ham bone. If you prefer your soup smooth, use a stick blender to puree it. Add cubed ham (and any ham remaining on soup bone) and season to taste. Simmer for about 10 minutes more to warm the ham through. 
  • Serve with pumpernickel croutons if desired. This soup will thicken more as it cools. To reheat, you may need to add water.


Thursday, November 10, 2011

Gingerbread Bundt Cake


     Happy National Bundt Day! This Gingerbread Bundt Cake, made with stout beer and fresh ginger, is a great way to kick off your holiday baking season. The smell of molasses and ginger always makes me feel all warm and cozy, especially when the air is crisp and cool outside. Wouldn't this beautiful bundt would be a lovely addition to your Thanksgiving table? It's spicy, moist with the complex flavors of molasses and stout, and covered with a gingery glaze made with my favorite ginger ale of all time.


     Bottled in the Northern Neck since 1926,  Northern Neck Ginger Ale is a taste of home for me. I appreciate its crisp, peppery bite that sets it apart from others. It's only sold in cans and plastic bottles now, but I remember the signature green glass bottles with the bubbles on the front!


     And if a gingerbread bundt doesn't suit your fancy, head over to The Food Librarian. For the past three years, Mary has celebrated National Bundt Day by baking thirty bundts for each of the thirty days leading up to it! You can find her bevy of beautiful bundts here, and I bet you can find one that you'll want to bake. It's O.K. to celebrate the occasion a little late, especially if it involves eating  cake. :)


Stout Gingerbread Bundt Cake
from All-Time Best Holiday Recipes,  America's Test Kitchen
Ingredients
2 1/2 cups (12 1/2 oz.) all purpose flour
2 teaspoons baking powder
3/4 teaspoon baking soda
3/4 teaspoon salt
16 Tablespoons unsalted butter
2 Tablespoons ground ginger
2 teaspoons ground cinnamon
1 teaspoon ground allspice
1/4 teaspoon black pepper
4 large eggs, room temperature
1 1/2 cups (10 1/2 oz.) sugar
4 teaspoons grated or minced fresh ginger
3/4 cup robust or dark molasses
3/4 cup stout beer (I used Guinness)
Glaze
1 3/4 cups (7 oz.) confectioners sugar
3 tablespoons ginger ale
1 teaspoon ground ginger

Cake Instructions:
  • Preheat oven to 375 degrees. Grease and flour 12-cup Bundt pan.
  •  Whisk together flour, baking powder, baking soda and salt in a large bowl.
  • Melt butter in saucepan over medium heat. Stir in ground spices and cook until fragrant, about 30 seconds. Remove from heat.
  • Whisk eggs, sugar, and fresh ginger in large bowl until light and frothy. Stir in melted butter mixture, molasses, and stout until incorporated. Whisk flour mixture into egg mixture until no lumps remain.
  • Pour batter into prepared pan and gently tap pan on counter to release any air bubbles. Bake until skewer inserted into center comes out clean, about 45 minutes.Let cake cool in pan for 20 minutes, then turn out onto wire rack; let cool completely.
  • Prepare glaze: Whisk all ingredients in bowl until smooth. Pour glaze over cooled cake.
  • Enjoy! 


Broccoli Ramen Salad


     Colorful and crunchy, with a tangy yet sweet dressing, this easy salad is great with anything from fried chicken to hot dogs. It's perfect for potlucks, tailgates, fall picnics or to accompany a quick sandwich at home for lunch. It's even still delicious the day after it's prepared, when all of the flavors have melded together and the dressing has soaked into the ramen noodles.

     The hardest (ha!) part of the preparation is chopping the onion and smashing the dry noodles into bits (fun!) which makes this ideal for those times when you need something in a hurry. And who doesn't need fast food now and then?

Broccoli Ramen Salad
1 bag Broccoli Slaw Mix (12 oz.) If you can't find this already bagged, it's just a mixture of julienne broccoli stems, julienne carrots and shredded red cabbage
1 pkg. Ramen Noodles (Beef, Chicken or Oriental flavor)
1/2-1 cup sliced almonds
1/4 cup oil (Canola or light flavored olive)
1/3 cup sugar (up to 1/2 cup if you prefer a sweeter taste)
1/2 cup vinegar
1/4 cup dried cranberries
1/2 medium red onion, finely diced

Break up the ramen noodles (in the bag) and place them in a large bowl with the broccoli slaw mix, almonds, cranberries and onion.
Mix together oil, vinegar, sugar and seasoning packet (optional) from the ramen noodle soup. Pour over the slaw mixture and toss together. If you prefer not to use the seasoning packet, you may want to add some salt. Serve immediately (ultimate crunch!) or refrigerate to serve later.

Miz Helen’s Country Cottage

Sunday, November 6, 2011

Brown Sugar Maple Walnut Cut-Outs


     Call me a sentimentalist. I love getting letters. The real ones, I mean, written on paper with a pencil or pen. Some of my favorite notes of recent have been painstakingly drawn with crayons on scraps of crumpled notebook paper. In these days of email and texts, a handwritten note carries with it an air of warmth and care.

     Handwritten recipes are like that too. I have a box full of recipes that my friends and family have shared with me, most of them handwritten on recipe cards, notebook paper, index cards- whatever was handy at the time. Going through my recipe box is like a trip down memory lane, recalling special people and special times.

     When this handwritten recipe card fluttered to the floor out of a book I was shelving at the thrift store where I volunteer, I knew at once that it had also been special to someone. Lovingly handwritten (by a Grandma, no less),worn and stained, it had all of the earmarks of a well loved  recipe- one that would feel right at home in my recipe box.


     I changed very little of the recipe, adding some maple flavoring and topping it off with a walnut half and a divine maple glaze. (I had to resist the temptation to eat it by the spoonful.) These brown sugar beauties were perfectly chewy with crisp edges and a rich, buttery maple flavor.  I'm pretty sure Stephanie's Grandma would approve.


Brown Sugar Maple Walnut Cut-Outs
"Receipt" adapted from Stephanie's Grandma
Cookies
2 2/3 cups brown sugar, lightly packed (sift to prevent lumps)
1 teaspoon salt
1/2 lb. soft butter or oleo
2 eggs, not too small
1/2 teaspoon maple flavoring
1/2 teaspoon vanilla extract
3 1/2 cups all purpose flour 
1 tsp. baking powder
1/2 tsp. baking soda
1/2 tsp. cinnamon
Walnut halves or pieces (Toasting the walnuts slightly brings out their flavor.)

Maple Frosting ingredients
1/2 stick butter
2 cups confectioners sugar (sifted, to prevent lumps)
1/2 tsp. maple flavoring
1-2 Tblsp. brewed coffee, hot

Directions for making cookies:
  • Cream together sugar, salt and butter. 
  • Beat eggs, maple flavor and vanilla extract together. Add to sugar and butter mixture.
  • Sift dry ingredients together and gradually blend into above mixture.
  • Chill well. Roll out on floured surface to 1/4 inch thickness.
  • Cut with cookie cutters (I used leaf shapes, but a circle would be just as nice) and bake on parchment for 8-10 minutes, or until cookies are brown around edges. (Actual baking time will depend on the thickness and diameter of your cookies.)
  • Cool on wire rack. Yield depends on thickness of dough and size of your cookie cutters.
  • Use frosting (recipe follows) to attach a walnut half to each cookie. Drizzle frosting over cookie and walnut. (Or frost cookies and scatter chopped walnuts on top.)
Maple frosting:
  • Melt butter in skillet. Remove from heat.
  • Whisk in flavoring and confectioners sugar.
  • Thin with hot coffee. Whisk until smooth and of drizzling consistency. (Thin with more coffee if needed.)


This post is linked to:


Sunday, October 16, 2011

Apple-Almond Streusel Pie


     Sweet almond paste sandwiched snugly between layers of flaky crust... Tender apples spiced with warm cinnamon ... Crunchy bits of toasted almond streusel ... So many reasons to love this pie!

     The quintessential fall fruit teams up with almonds here to create a treat worthy of any occasion. It's delicious warm or cold, and I say this with authority having made it twice already in the past week. I first saw this pie in the new Pampered Chef catalog, and it sweetly called my name. Hope it calls yours too!

Apple-Almond Streusel Pie
Recipe from Pampered Chef  featured in Simply Sweet with my changes noted
You'll need:
For the crust:
two pie crusts (enough for a double crust pie) your favorite homemade or refrigerated
1  8oz. can of almond paste (or 7oz. tube)
1 tsp. cornstarch
2 egg whites, divided (One of these is just for moistening the edges of the pie crusts to keep them together, so I used the white of an extra large egg and saved back a teaspoon of it to brush on the crusts.)
For the filling:
3 to 3 1/2 lbs Granny Smith Apples, peeled (8 cups sliced)
1 Tablespoon lemon juice (I used 2 Tablespoons)
1/2 cup packed brown sugar (I used a bit less than this)
1 teaspoon Cinnamon Spice Blend (Pampered Chef has its own blend. I didn't have any so I used my own spice blend, recipe here.)
2 Tablespoons butter
For the Streusel topping:
1/3 cup all purpose flour
1/2 cup granulated sugar
2 Tablespoons butter, melted
1/3 cup sliced almonds (I used more than this)

Directions:
  • Preheat oven to 370F or 190C.
  • Place almond paste, one egg white and cornstarch in the bowl of a food processor. Process until smooth.
  • Roll each of the pie crusts into a 12 inch circle. Spread almond paste onto one pie crust to within 1/2 inch of edge. Lightly beat the reserved egg white and brush over the edge of the crust not covered by the almond paste.
  • Carefully place the second pie crust on top of the first. Pat together gently and press edges together with fingertips. Using a pastry cutter, trim 1/8 inch edge off of the crust to create a decorative border.
  • Place crust into a deep dish pie pan, pressing dough into bottom and up sides. Prick bottom and sides. Bake for about 30-35 minutes, or until edges are light golden brown. (I had to cover the edges to keep them from browning too quickly.) While the crust is baking, prepare the filling.
  • Filling: Pour lemon juice into a large bowl. Peel, core and slice apples into the lemon juice. Add brown sugar and spices; toss to coat.
  • Melt butter in a skillet. Pour apple mixture into the skillet and cook, covered, over medium high heat until apples are tender. (6-8 minutes)
  • Strain cooked apples over a bowl, reserving the liquid. Return the liquid to to the skillet and cook 2-3 minutes on medium-high heat until thickened and amber in color. Toss with apples and pour into crust.
  • Combine flour, sugar and melted butter; stir until crumbly. Add almonds; toss to combine. Sprinkle topping over pie. Bake 20-25 minutes or until topping is light golden brown.
  • Serve warm

This post is linked to:


Monday, October 10, 2011

White Chicken Chili

    
     Who says chili has to be red? Not me. One of my favorite kinds of chili is this white chicken one, which really hits the spot when the weather starts getting cooler. Several years ago I was unable to eat tomatoes in any form, so this chili was  the one I turned to. I can eat tomatoes now but I still love this as a change of pace from the beefy tomato based ones usually associated with the name.  

     This is a heart healthy recipe, especially if you stick to low sodium chicken broth and beans. If you can only find regular beans, rinsing and draining them helps to remove excess sodium. (Another option would be to use dried beans that you've pre-soaked.) A heart healthy topping would be avocado, one of my favorites with any kind of chili. Spice it up with peppers and salsa, and it'll keep you warm from the inside out!

White Chicken Chili
3 chicken breast halves (about 1 1/2 lbs.) cut into small cubes*
1 large onion, chopped
2 cloves garlic, chopped
2 Tblsp. olive oil
1 qt. chicken broth (homemade or canned)
2 small cans chopped green chiles (I used some Hatch chiles that I'd roasted and frozen- yum!)
1 bag frozen white corn (or canned)
3 cans white beans, drained**
2 tsp. cumin
1/2 tsp. black pepper
cayenne or white pepper to taste (I love the spiciness that the white pepper gives it.)
For garnish:
shredded pepper-jack cheese
low fat sour cream
fresh cilantro
chopped avocado
salsa or hot sauce, green or red
  • Saute chicken, onions and garlic in olive oil and spices.
  • Add rest of ingredients (except cheese and other garnishes) and simmer on low for about an hour, or until flavors have blended well.
  • Serve with shredded cheese.
  • Top with sour cream, fresh cilantro, salsa or chopped avocado if desired.
*If you prefer, you can use cooked chopped chicken (a rotisserie would be handy) and add it when you add the beans.
**You can use any combination of beans you like. Great Northern are my favorites for this, but I've also used them in combination with Cannelini, Chickpeas, and even black eyed peas. Hominy is good in this also!


Wednesday, October 5, 2011

Triple Threat Brownies (Or should I say Triple Treat?)


     Disclaimer: These brownies are only sort of homemade. They're homemade in the sense that you make them at home. But they are very easy. You can put them together very quickly. And they are very good. Here's what you'll need:


     Double Stuff Oreos, brownie mix, and refrigerated cookie dough. Yep, that's it. Three things. (If you don't count the extra ingredients that go in the brownie mix, anyway.)

     Here's what you do. First, line a 9x9 baking pan with parchment paper or nonstick foil. Press that refrigerated chocolate chip cookie dough evenly over the bottom of the pan. Cover the dough with a layer of Oreos. Mix your brownies according to the directions on the box and pour the batter right over the top of the Oreos. That's it. Bake it at 350 degrees for about 40-45 minutes, or until the brownie layer is done. Cool completely in the pan, then slice and swoon.

     Since I'm trying to practice moderation in all things sweet, I cut them into small bars. But if you want something a little more festive, you could cut them big enough to hold a scoop of vanilla ice cream with some fudge sauce poured over the top. Visit Kevin and Amanda for their wonderfully decadent "even more homemade" version of these. Just be prepared to drool!

Monday, September 12, 2011

Johnny Appleseed Squares


"Oh, The Lord's been good to me
And so I thank the Lord
For giving me the things I need,
The sun and the rain and the apple seed,
The Lord's been good to me."
(Johnny Appleseed Hymn)

      Most school-age children in the United States have heard of Johnny Appleseed, the legendary American frontiersman who planted apple trees over large parts of Ohio, Indiana and Illinois from seeds recovered from cider mills. From all accounts he was quite an individual! So, while browsing through a copy of Maida Heatter's Book of Great American Desserts, the recipe for these Johnny Appleseed Squares caught my eye. An apple for the teacher? Works for me.

     These bars were sweet, spicy, chewy and chunky and tasted like fall, if that's possible, and the thinly sliced apples sandwiched between the layers of spicy, chewy, chunky oatmeal made them wonderfully moist. The cake-like squares were delicious all by themselves, but I can just imagine how they'd taste topped with a scoop of vanilla ice cream and gooey caramel drizzled over the top.

     Maida says that she first tasted these bar type cookies at a "gift shop somewhere along the spectacular Skyline Drive in Virginia" and immediately requested the recipe. Skyline Drive, in the Blue Ridge Mountains, has been a fall destination for our family ever since I can remember. The colorful panoramas are breathtaking, and apples are plentiful. Jugs of sweet cider and jars of rich apple butter abound at orchard stands along the route. We haven't made our annual apple pilgrimage yet - we usually time it to coincide with the "peak" leaf color- but cool nights and crisp mornings tell me that I won't have too much longer to wait!


Johnny Appleseed Squares
from Maida Heatter's Book of Great American Desserts
1 cup all purpose flour
1/2 teaspoon baking soda
Scant 1/2 teaspoon salt
1 teaspoon cinnamon
1/4 teaspoon nutmeg or mace
1 1/2 cups quick-cooking rolled oats
2/3 cup dark or light brown sugar, firmly packed (I used dark.)
1 stick unsalted butter, melted
1 large egg
1 teaspoon vanilla extract
2 to 3 firm cooking apples (I used 2 large apples.)
1/2 cup toasted pecans, cut or broken into small/medium size pieces (optional)

Directions:
  • Preheat oven to 350 F. Line a 9 inch square baking pan with foil, making sure the edges extend over the edges of the pan for easy removal. Butter foil then place the prepared pan in the freezer. (This makes it easier to spread a thin layer of dough in the pan.)
  • Sift together flour, baking soda, salt, cinnamon and nutmeg or mace. Stir in the oats and sugar. In a small bowl, stir together the butter, egg, and vanilla and mix into the oat mixture.
  • Press half of the dough (1 cup) into the prepared pan. Set aside.
  • Place the remaining dough between two 12 inch lengths of wax paper and roll out into a 9-inch square. (It will be very thin.) Slide a flat cookie sheet under the dough and wax paper and transfer it to the freezer for a few minutes.
  • Meanwhile, peel, quarter and core the apples and cut each quarter lengthwise into 5 or 6 slices. (Not too thick.) Place the apple slices in rows, each slice slightly overlapping another, to cover the bottom layer of dough. Sprinkle with the nuts.
  • Remove the rolled-out square of dough from the freezer, peel off the top piece of paper, turn the dough over the apples. Remove the remaining paper and press down on the edges of the dough. 
  • Bake for 25 to 30 minutes. About 10 minutes before the cake is done, if the top has not started to brown, raise the rack to a higher position.
  • Cool in the pan.  Lift cake out using the edges of the foil, and cut into squares or bars. (Maida says that chilling the cake makes it easier to cut neatly. She also adds that they freeze well.)

Wednesday, August 24, 2011

Peach Confetti Salsa, and a Shake, Rattle and Roll!


     An earthquake? Seriously? C'mon now, we're on the east coast! Thankfully, there was not much damage here- some broken china and ceramic chickies- but it was kinda scary while it was happening. Earthquake veterans might be rolling their eyes about now, but I'm new to this. The last significant earthquake in Virginia was back in 1897, before my time, so I haven't had any experience with this sort of thing. I sure hope everyone else is okay!

     And this salsa? This salsa is definitely okay. It's made by my sister's recipe, with a rainbow of veggies and fruit from my brother's vegetable stand. The sweet peaches and spicy peppers blend together to make a mouthwatering combination, and make the perfect healthful dip for your chips. (This would also be wonderful on grilled chicken, or even on a hotdog!) I love a snack I can eat without feeling pangs of guilt and regret, don't you?


Peach Confetti Salsa- from my sister's recipe
2 sweet, ripe peaches, diced
1 Tablespoon lime juice
2 medium sized Roma tomatoes, diced (I used one red and one yellow)
1 jalapeno pepper, diced (very small dice)
1/4 cup sweet pepper, diced (I used a mixture of red and banana pepper.)
1 Tablespoon of sweet onion, diced (I used a little more than this.)
1 teaspoon diced basil (or cilantro if you prefer) (I used a little more of this, too)
2 teaspoons sugar (or to taste)
salt and pepper to taste (I use less salt than most people would, so I hesitate to put an amount.)
Mix all ingredients together in a non-reactive bowl. Taste for seasoning. If you like your salsa hotter, add a little more jalapeno. (This is a mildly spicy salsa the way it is written.) If you like your salsa sweeter, add more sugar. I found that the addition of the sugar brought out the flavor of the peaches more. If you have really ripe, sweet peaches you might not need as much. Let the salsa sit for at least an hour before serving, to give the flavors a chance to mingle. Store leftovers (if there are any) in the refrigerator.

This post is linked to These Chicks Cooked link party ,

Monday, August 22, 2011

Crab Cakes- a Family Recipe


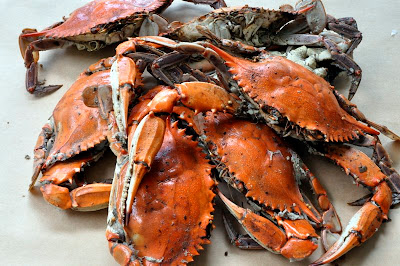
    I am a crab cake snob. There, I said it. As much as I love crab cakes, I seldom order them in restaurants.  You see, I don't like a bunch of "stuff" in my crab cake that's not crab. No green peppers. No onions. No parsley. I love the taste of the crab itself, and that's what I like my crab cakes to taste like. I want them to taste like the ones my mom makes. Like the ones that my grandma made when I was a little girl visiting her and my granddaddy in the little fishing village by the "crickshore."

    My grandpa was a waterman, and blue crabs (callinectes sapidus) were plentiful in the summertime. He'd send a bushel basket of them home with us, their claws scrabbling against the wooden slats. We had to be careful because those claws would pinch! We had to cook the crabs alive- that's the part I never liked. Crabs that were blue when they went into the pot came out of the pot a gorgeous orangy-red color, and were ceremoniously placed in the middle of our newspaper-covered table to cool enough to be devoured.

    While everyone else was picking and eating crabs, my mom was usually picking out crabmeat and setting it aside to make crab cakes or deviled crab, another favorite. The following recipe for crab cakes is the one I grew up eating. I made some last week from crabs my brother shared with me, and we enjoyed them with cole slaw, sweet corn on the cob and fresh tomatoes. Summer eating doesn't get much better than that, does it?


Crabcakes
1 lb. fresh crabmeat
4 slices white bread, crusts removed
1 egg
3-4 Tablespoons  mayonnaise
2 teaspoons prepared yellow mustard
1/2 teaspoon baking soda
dash of Worcestershire sauce
pinch of sugar
cayenne pepper to taste (I use about 1/4 teaspoon)
salt to taste- Depending on how they're cooked, some crabs may need more salt than others.We don't eat much salt, so I find that the salt the crabs are cooked with is sufficient and I don't add any extra.
To prepare:
Pick through crab meat to remove any bits of shell.
Hold slices of bread under running water to wet. (Careful- they get mushy quickly!) Gently squeeze slices to remove most of the water. You don't want them dripping with water, but you also don't want to squeeze them into a hard lump.
Put moistened bread into a bowl with the egg, mayonnaise, mustard, baking soda, Worcestershire, sugar, salt and pepper. Mix thoroughly until mushy.
Add crab meat and gently mix until combined. (I like to leave my crab in bigger pieces so I mix it as little as possible.)
Form the crab mixture into cakes. (I use about 1/3 cup per cake.)
Cover the bottom of a frying pan with vegetable oil. Heat oil until hot. Place crab cakes in hot oil, reduce heat to medium and cook until golden brown, turning once.
Remove to paper towel to drain.


 This post shared with:

Monday, August 15, 2011

"How I Spent My Summer Vacation"

Isn't that the requisite "back to school" essay? I went back to school today, and instead of dwelling of things I didn't accomplish this summer (blogging? cleaning the basement?) I'm determined to look back instead on what I have done. So here goes.


Hubby and I replaced our quiet evenings at home in the recliners (laptops included) with quiet evenings on our bikes exploring nearby neighborhoods. We've found some lovely places to ride, and go for miles and miles.


I think I finally picked enough blackberries. I wish you could have joined me! Some went into jam right away, and the rest went into the freezer for later.


My grandson (and his parents) came for a wonderful visit. We played in the sand, saw dinosaur bones and had a Happy Un-birthday party complete with strawberry cupcakes with whipped cream frosting.


I've been frequenting my brother's vegetable stand and enjoying all the bounty of the season. He grows Argent sweet corn, which is the BEST!

 
When it got too hot, we headed for the hills, hiking trails in Shenandoah National Park. We sat at an overlook at dusk, enjoying this glorious sunset.


But I haven't had my fill of these yet. There's still enough room in summer to squeeze in a few more of these and make some crab cakes from my grandma's recipe! (Coming soon, I promise!)

Wednesday, July 13, 2011

Heirloom Tomato Pie

 
     I have a love-hate relationship with tomatoes. I love a beautiful tomato, ripened on the vine. I love to grow it, to look at it, to hold it, even to smell it. I love all of the beautiful colors and shapes of tomatoes, especially the lovely heirlooms with fanciful names like Radiator Charlie's Mortgage Lifter, Kellogg's Breakfast, or Aunt Ruby's German Green. But that's where the love affair takes a turn.

     There are those who would take a warm, ripe tomato and take a bite out of it, the juice running down their chins. Here's where I have to make my true confession: I am not one of those. I am not a raw tomato eater. Okay, I'll tolerate them in salsa, or on a sandwich, or sometimes even in a salad, but I really do not like crave tomatoes in their natural state. Cook those tomatoes, however, and I'm there. Stewed, sauced, roasted- I love them!


     I saw  this tomato pie on the cover of the latest Food Network magazine, and I knew right away that I had to make it. Beautiful (cooked) heirloom tomatoes of all colors and sizes adorn the top of this cheesy pie baked to perfection. It's full of caramelized onions nestled in a crust crunchy with cornmeal and shredded cheese, and it's a beautiful way to savor the quintessential summer fruit. Paired with a salad, a slice of it makes a lovely dinner, and I hope you have a chance to try it while tomatoes are at their very best!

     You can find Food Network's recipe for Heirloom Tomato Pie here. I followed the recipe as it was written, except I substituted globe basil for thyme and cut back on the salt in both the crust and the filling. I also spread about a Tablespoonful of Dijon mustard over the bottom of the baked pie shell before I added the fillings. The pie shell was a bit time consuming, so if you're in a pinch for time, try a regular one. If you can't find the Manchego cheese (I had to make a trip to Wegman's for it!) I suggest using Parmesan, Asiago or Romano. If you don't have heirloom tomatoes, any beautiful vine ripened tomatoes will do. Really, how can you go wrong with baked tomatoes and melty cheese?


Thursday, July 7, 2011

Very Berry Jam - Make Your Biscuits Smile!


     Blackberries are finally ripe for the picking in our parts, and I didn't waste time getting to my favorite little berry patch to pick some of those deep purple gems. There were a few raspberries left hanging on the canes as well- right next door to the blackberries- and they just happened to find their way into my mouth basket when I wasn't looking.  I love picking berries, especially when there are no thorns to contend with. And I love making jam. If you've never had homemade jam, you don't know what you're missing. One taste of this sweet and tart delight on your biscuit or toast will definitely spoil you- you'll never want the store bought kind again.

     I picked several quarts and headed home with berry stained fingers and my tooth set for some delicious, berry jam! Jam just makes a biscuit smile, and this jam is the easiest ever. It's really more of a method than a recipe, and you can easily adapt it to whatever (and however many) berries you have. No pectin needed- just berries, lemon juice and sugar. You can make a big batch and can it, or if you just want to make a little bit you can store it in your refrigerator for a couple of weeks- if it lasts that long!

Very Easy Very Berry Jam
Ingredients:
Berries- I used a mixture of Blackberries and Raspberries
Lemon juice- I used 1 Tablespoon for every cup of berry juice/pulp
sugar- I used 1 cup for each cup of juice/pulp.

To make the jam, I used the guidelines for making jam without pectin from the National Center for Home Food Preservation. If you're planning to can your jam, first prepare your jars.

Wash berries and place in a large saucepan. Mash berries and gently heat over low heat (do not boil) to release juice. I heated mine for about five minutes. If you don't want seeds in your jam, you can strain this mixture through a sieve or through several thicknesses of cheesecloth. I like the pulp and a few seeds in my jam so I ran mine through a Foley food mill to remove most- but not all- of the seeds. Measure the juice/pulp and put it into a large pot. (Don't try to cook more than 5-6 cups of juice/pulp in a batch.) Stir in 1 cup of sugar and 1 Tablespoon of lemon juice for each cup of juice/pulp.

Bring to a boil and boil rapidly, stirring constantly until the mixture thickens. Use one of the following methods to determine when your jam is ready.
  • Boil until the mixture reaches 220F on a candy thermometer. (See this chart for altitudes other than sea level.)
  • Boil until the mixture falls of the spoon in a "sheet" rather than a stream.
  • Drop a spoonful of the mixture on a cold plate and put it in the freezer for a few minutes. Take it out and see whether or not it is thick enough. (The jam will thicken as it cools.) 
Remove from heat, skim off foam (if there is any) and pour jam into prepared jars. If you are canning your jam, follow instructions here. If you are not canning your jam, it will keep in your refrigerator for about two weeks.

Thursday, June 23, 2011

A Butter and Sugar Hug for Monet- My Mama's Cold Oven Pound Cake


     My Mama has been making this pound cake for as long as I remember, and whenever I make it, it reminds me of home and my family and just wraps me up in a great big butter and sugar hug. I'm re-posting this recipe today for Monet, the sweet and insightful writer of anecdotes and apple cores, who needs some hugs right now. She and her family have been beset by tragedies recently, and Lizzy and Kate came up with the idea of making her a book of comfort food recipes- foods to soothe the soul. I know that food can't solve all of the problems in the world, but it sometimes makes them easier to bear. Here's a hug today Monet, from my mama and me.

My Mama's Cold Oven Pound Cake

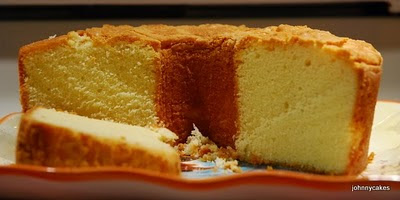
     My Mama makes the BEST pound cake in the world. Tender crumb on the inside, with a slightly chewy crust...yummmm. Not too sweet, it's as good all by itself with a cold glass of milk as it is dressed up with strawberries and whipped cream. And toasted with a little bit of vanilla ice cream on top? There's nothing better, I'm sure. Mama's cake always has a fine crumb and lovely light texture-never heavy. And it always tastes better when she makes it- it's a buttery slice of home!


Mama's Cold Oven Pound Cake (printable recipe)

Ingredients:
1 cup butter
1/2 cup vegetable shortening
scant 3 cups sugar
3 cups cake flour
1/2 teaspoon salt
1 cup milk
4 eggs from happy hens
1 tsp. vanilla (2 if you don't use the butter and nut)
1 tsp. butter and nut flavoring (optional)

Cream together butter, shortening, and sugar.
My mama always used a hand mixer for this and her cake always turns out better than mine!
Beat in half of the cake flour, half of the milk, and the salt until combined.
Beat in eggs, one at a time. (Beat each one in until it disappears into the batter- don't over-beat.)
Beat in the rest of the cake flour, milk, and flavorings.

Pour batter into a greased and floured tube pan. Put in a cold oven and set temperature to 325 degrees. Bake for 1 hour. Increase temperature to 350 degrees and bake for 30 minutes longer or until cake is done. (cake tester comes out clean)

Monday, June 6, 2011

Rocky Road Fudge Bars


     Two weeks of school left (not that I'm counting,) and end of year preparations have left our teaching staff stressing over assessments, data collection and school improvement plans for next year. The kids, on the other hand, are already making plans for their upcoming weeks of freedom and have visions of bare feet, water parks and lazy summer days dancing in their heads. When patience gets thinner and teacher survival mode kicks in, chocolate can be a girl's best friend.

     Luckily I found these Rocky Road Bars on The Sweet Details (formerly Eating in Winnipeg) just in time to make a T.G.I.F. treat for the teacher's lounge. They turned out gooey and decadent, with walnut studded layers of chocolate, cream cheese and marshmallows. Just what the doctor ordered. Every time I passed by them I found myself cutting off just a little sliver of chocolaty deliciousness to help get me through the day.


     The chocolate chips and walnuts gave these luscious bars just the right toothsome bite, while the marshmallows and creamy fudge frosting made them gooey and delicious. I hope you try these- they're  perfect for calming frazzled nerves and putting a smile on your face. I guarantee. :)

     If you're looking for more delicious treats, check out Amanda's new blog, The Sweet Details. You'll find many more recipes there to tempt your taste buds!


Rocky Road Fudge Bars
Ingredients
Base:
1/2 cup (one stick) butter or margarine
1 oz. unsweetened chocolate, chopped
1 cup all purpose flour
1 cup sugar
1 teaspoon baking powder
1 teaspoon vanilla
2 eggs
3/4 cup chopped nuts (I used walnuts.)
Filling:
1 (8 oz.) package cream cheese, (I used Neufchatel.) softened- Reserve 2 oz. for frosting
1/4 cup (half stick) butter or margarine, softened
1/2 cup sugar
2 Tablespoons all purpose flour
1/2 teaspoon vanilla
1 egg
1/4 cup chopped nuts (I used walnuts.)
1 (6 oz.) pkg. semi-sweet chocolate chips
2 cups miniature marshmallows
Frosting:
1/4 cup (one half stick) butter or margarine
1/4 cup milk
1 oz. unsweetened chocolate, chopped
Reserved (2 oz.) cream cheese
3 cups powdered (confectioner's) sugar, sifted
1 teaspoon vanilla

Directions:
  • Heat oven to 350F. Grease and flour 13x9 inch pan. (I used non-stick foil.) In a large saucepan, melt 1 stick of butter and one oz. chocolate over very low heat, stirring until smooth. Remove from heat. Stir in one level cup flour and remaining base ingredients. Mix well and spread in prepared pan.
  • In small bowl combine 6 oz. softened cream cheese, 1/4 cup softened butter, 1/2 cup sugar, 2 Tablespoons flour, 1/2 teaspoon vanilla and one egg; beat one minute at medium speed until smooth and fluffy. Stir in 1/4 cup nuts. Spread over chocolate mixture. Sprinkle evenly with chocolate chips.
  • Bake at 350F for 25-35 minutes, or until toothpick inserted in center comes out clean. (I baked mine 30 minutes.) Remove from oven and immediately sprinkle with marshmallows. Return to oven and bake an additional two minutes.
  • While marshmallow layer is baking, in large saucepan combine 1/4 cup butter, 1/4 cup milk, 1 oz. chopped unsweetened chocolate, and reserved 2 oz. cream cheese. Cook over low heat, stirring until smooth. Remove from heat; stir in confectioner's sugar and vanilla until smooth. Immediately pour hot frosting over puffed marshmallows and lightly swirl with knife to marble. Refrigerate one hour or until firm. Cut into bars. Store in refrigerator.


Thursday, May 26, 2011

Red, White and Blue Strawberries: Memorial Day Rewind


Are you picnicking this weekend? Do you need to bring a treat?  I don't know about the temperature where you are, but here in VA it's hot, and heating up the kitchen doesn't thrill me. These strawberries, however, do. I posted them last year, but a treat as quick, easy and summery as this one deserves repeating.

I saw these red, white and blue beauties on Baking Bites a while back and immediately thought of all of the occasions they'd be perfect for. Memorial Day? Fourth of July?  Any holiday that calls for a festive touch of red, white and blue would benefit from these luscious berries.


Make some to share while strawberries are still in season- I guarantee they'll be appreciated.  I hope you all have a lovely weekend- have fun and keep safe!


Red, White and Blue Strawberries
recipe from Baking Bites
You'll need:
Strawberries- As many as you plan to dip
1 pkg.white chocolate chips or white dipping chocolate (bark)- found with baking supplies
Blue sanding sugar or sprinkles (The kind you decorate cookies with)
Directions:
  •  Wash your strawberries and let them dry thoroughly. Pat dry if necessary. Set aside.
  • Line a baking sheet or tray with wax paper or nonstick foil.
  •  Pour about half of the sanding sugar into a small bowl.
  • In another small bowl, melt white chocolate according to directions on package. I usually melt it in small increments in the microwave on low power until about 80% of it is melted. I then stir it until it is completely melted. If it is too thick, add about 1/2 teaspoon shortening (like Crisco) and stir until melted and smooth.
  • Holding a strawberry by the leaves on the stem end, dip into the white chocolate to cover about 2/3 of the berry. Let the excess chocolate drip back into the bowl. (If there's a "glob" of chocolate on the end of the berry, scrape it off onto the side of the bowl.)
  • Dip the bottom third of the chocolate covered berry into the blue sanding sugar.
  • Carefully place each berry onto the prepared tray or baking sheet to set.  (They will set quicker in the refrigerator.) Refrigerate until time to serve. These are best served the same day they are prepared!


    Related Posts with Thumbnails